Best Time to Visit Itsukushima Shrine: High Tide vs Low Tide Strategy & Photo Planning (2026)
Updated 2026 • Tide timing • Ferry + routing • Photo angles • Quiet loop • Festival cues
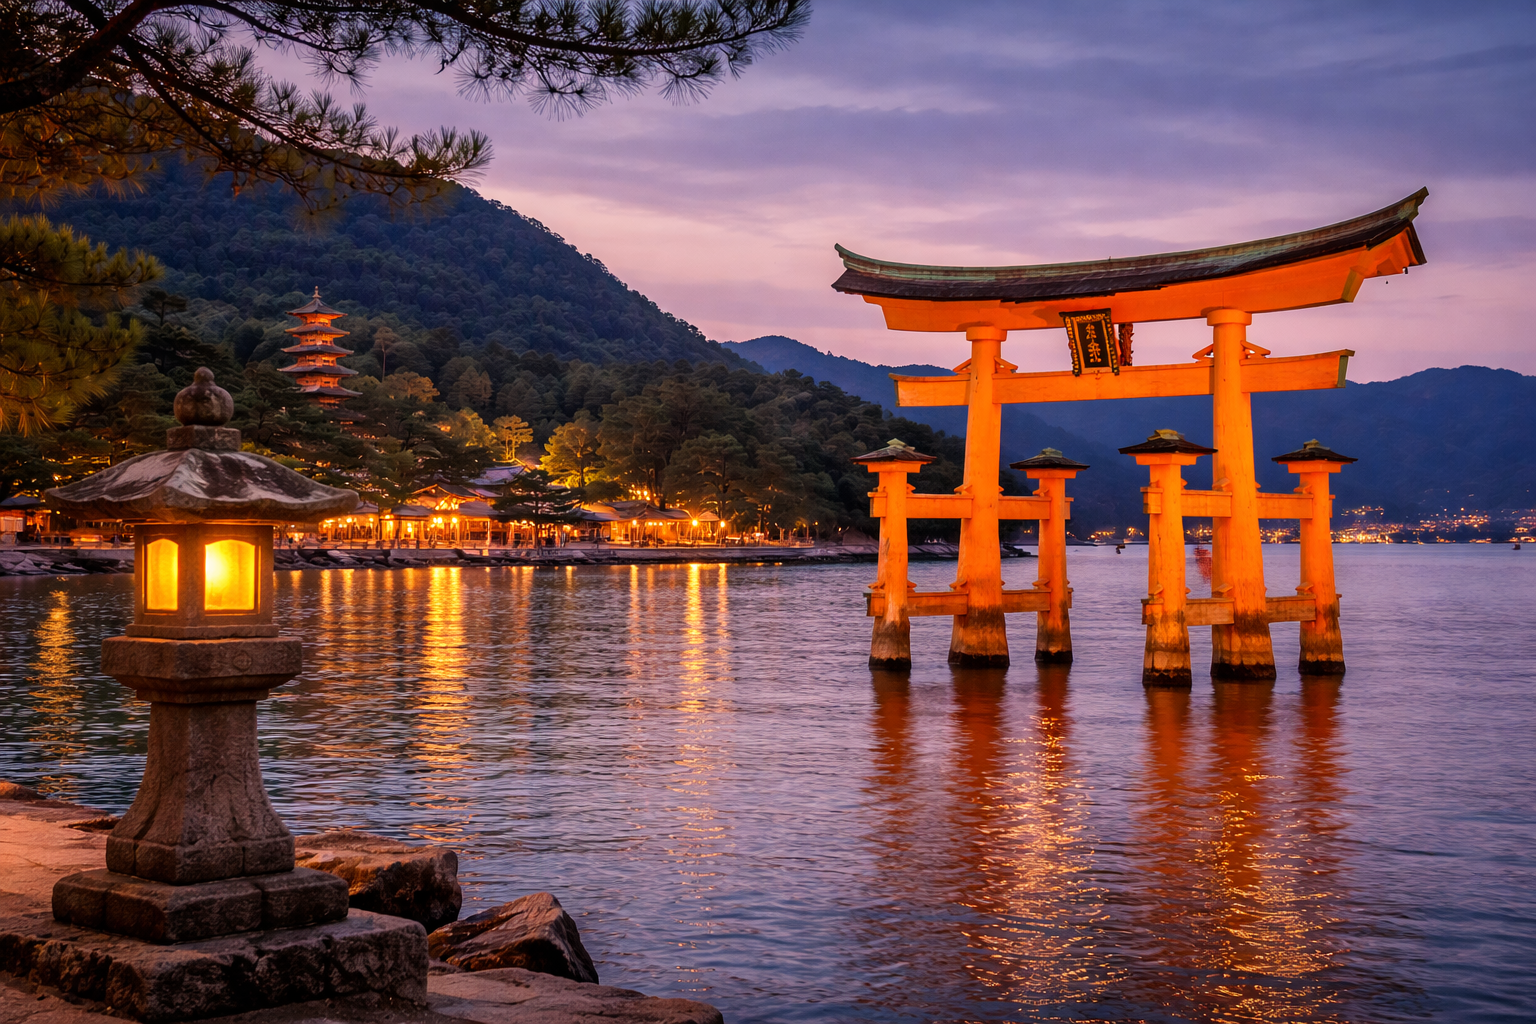
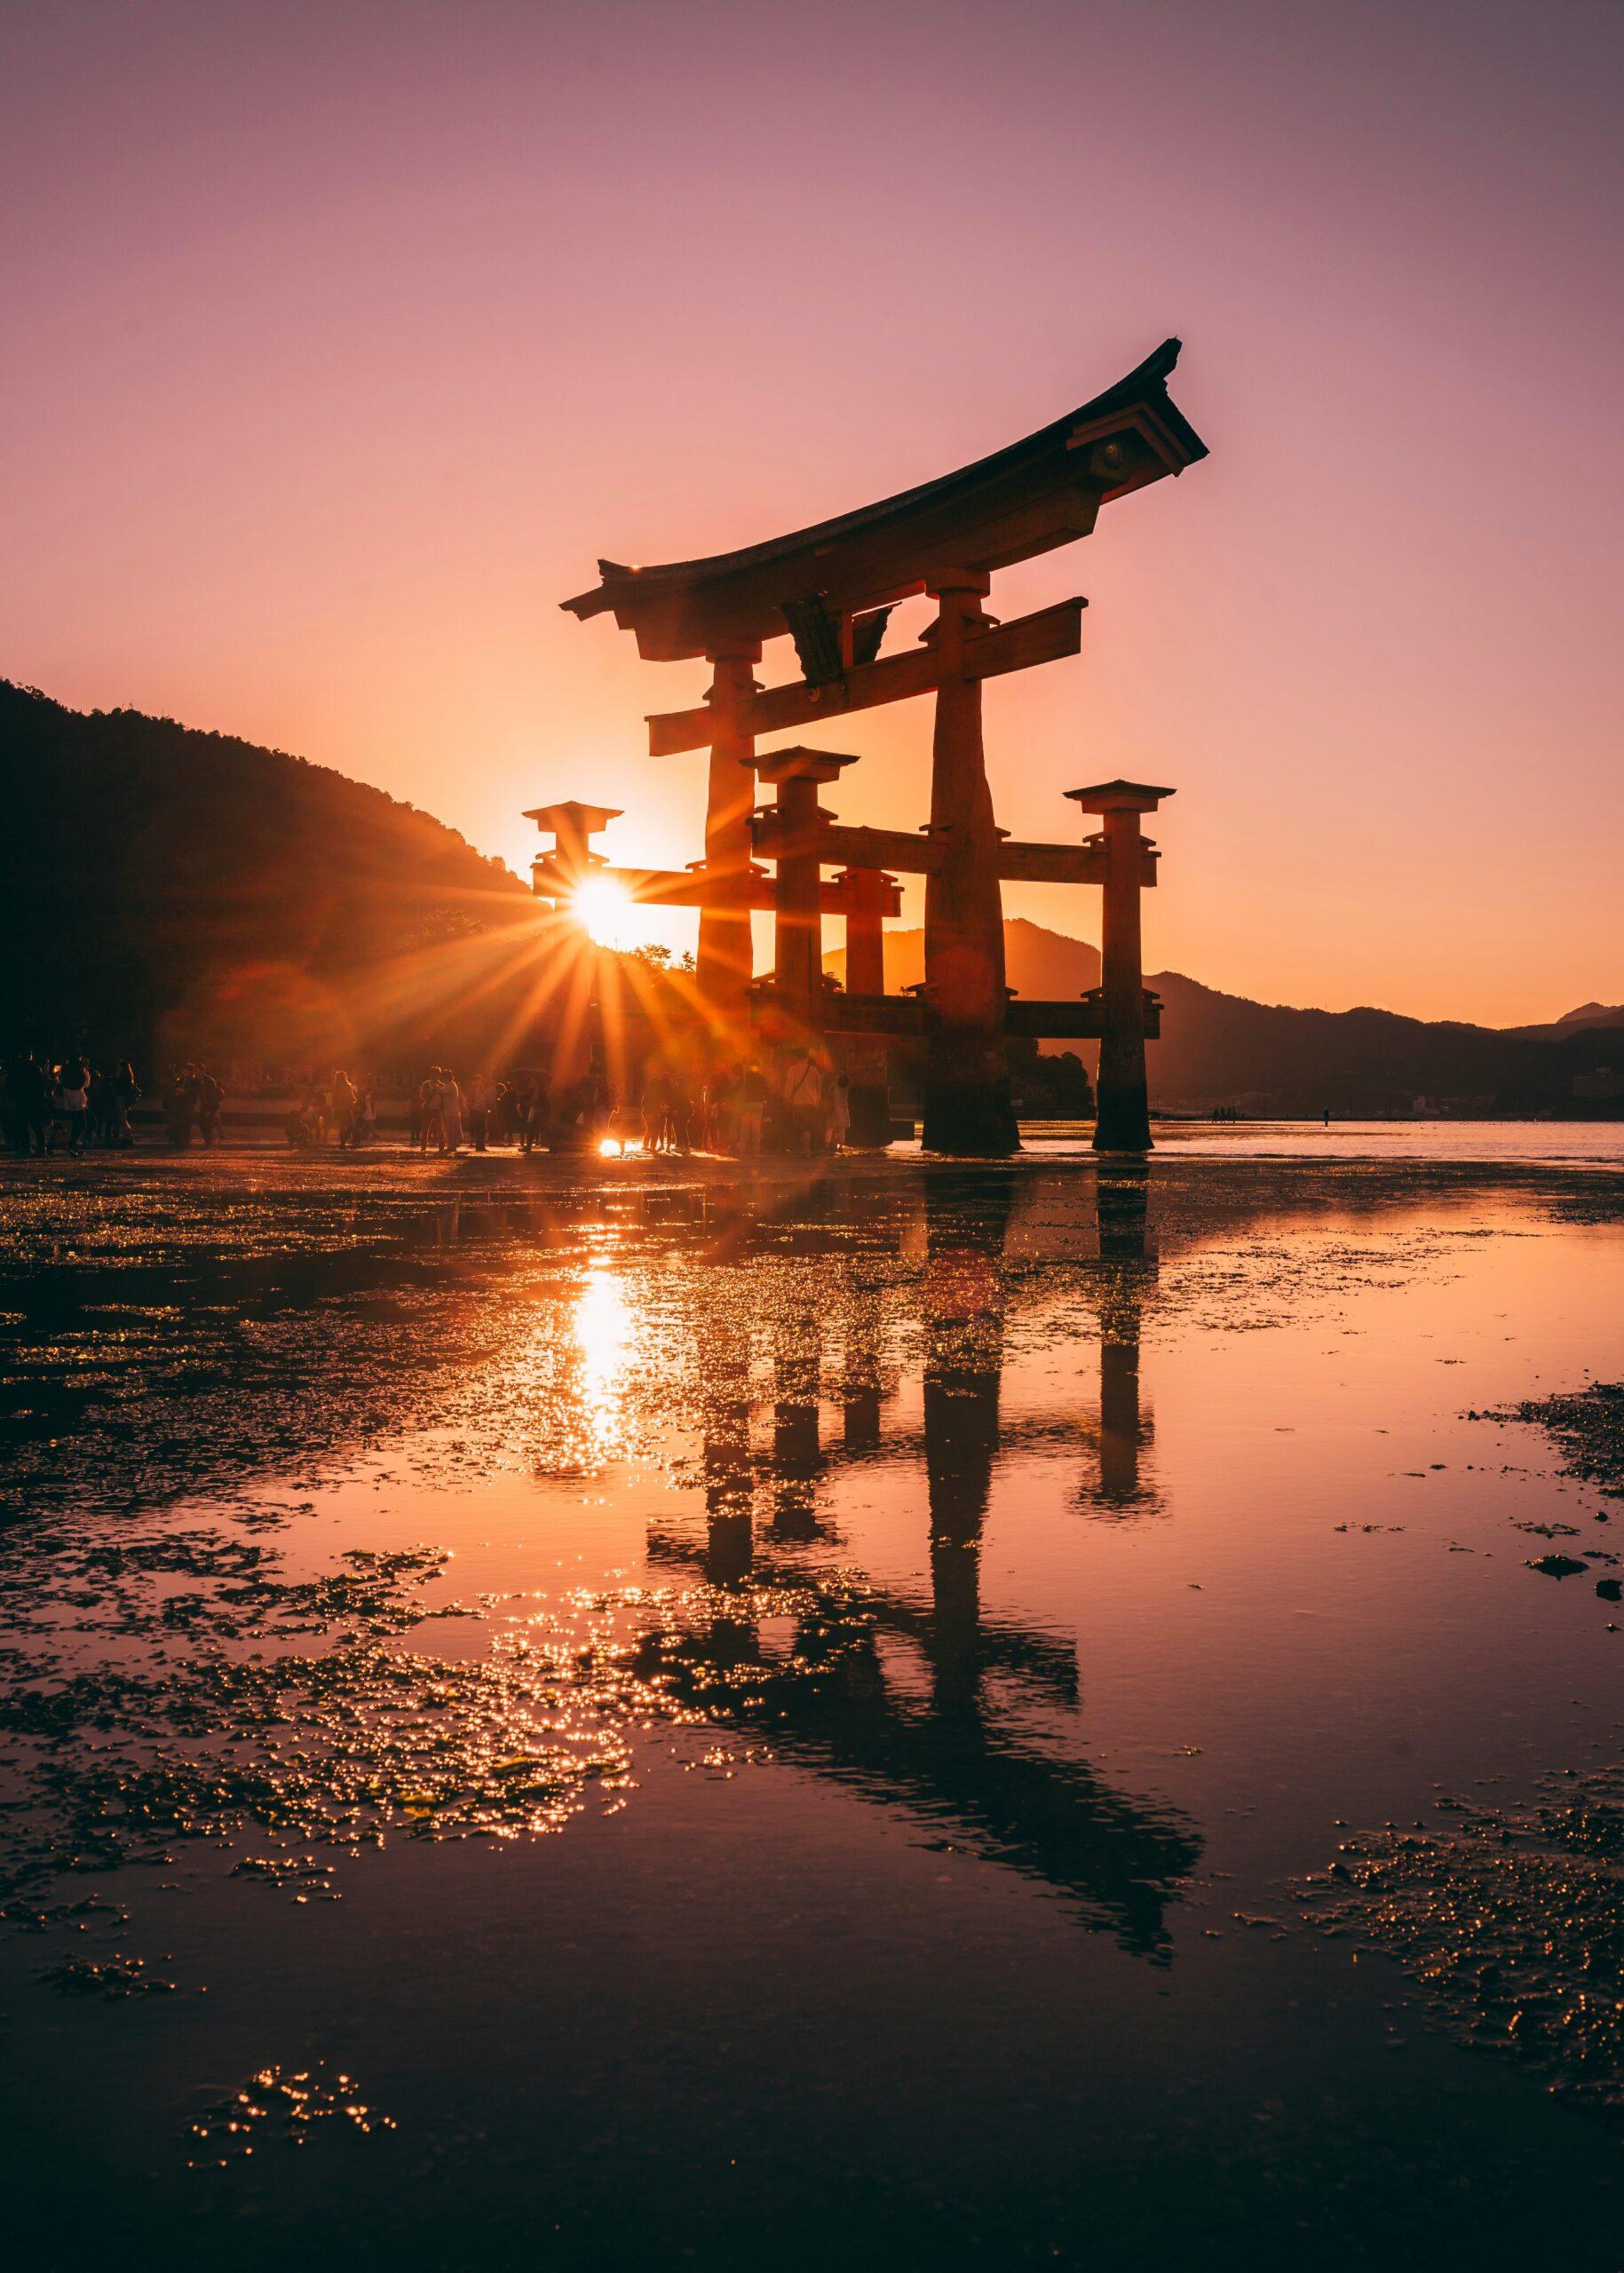
Itsukushima Shrine on Miyajima feels like a doorway more than a building—one that opens and closes with the tide. When the water rises, the vermilion torii appears to hover between sea and sky; when it drops, the island reveals a different kind of intimacy, with exposed shoreline textures and a slower, grounded atmosphere. If you plan around the tide rhythm, you’ll see two completely different versions of the same sacred place—both worth it.
What It Feels Like: When the Sea Becomes the Shrine
That first approach hits differently because it’s not a single view—it’s a moving scene. The torii grows larger with each step, the waterline shifts with the light, and even the sound changes (waves, gulls, footsteps on boards). You don’t feel like you’re “entering a site.” You feel like you’re entering a mood.
High tide is the postcard: torii floating, reflections, the shrine walkways feeling like they’re part of the sea. Low tide is the behind-the-scenes: more texture, more detail, and a calmer visual field. If you only see one, you’ll miss half the story.
Miyajima gets crowded fast, but it’s not chaotic if you use a simple rule: photo first, loop second. Do torii + shrine waterfront early, then step away into quieter paths (temple / park side) while everyone else piles into the same waterfront strip.
🧾 Key Information Matrix
The Core Idea: Why Itsukushima Feels Different
Most landmarks are static. Itsukushima is dynamic. The shrine doesn’t only “sit” on the island—it performs with the water. The tidal change reshapes sightlines, sound, and even how crowded it feels. That’s why this guide treats timing as the main attraction, not an afterthought.
Traveler mindset that works here: don’t chase perfect. Chase two moods—one water-high, one water-low. You’ll leave with better photos and a deeper sense of “I get why this place is sacred.”
⚖️ A vs B: The Tide-Smart Visit vs. The Random Visit
Step-by-Step: A Calm Miyajima Arrival
- Choose your tide window first: Decide whether you want the “floating” look (high tide) or the shoreline texture look (low tide).
- Arrive with buffer: Give yourself 20–30 minutes extra so you’re not speed-walking through a sacred place.
- Photo first: Do torii + shoreline viewpoints immediately, before you get pulled into shops and snack lines.
- Shrine walk next: Move into the shrine corridors with a slower pace—this is where the mood lives.
- Loop out: Step away from the waterfront for a quieter walk (temple / park side), then return if you want a second torii look.
🗓️ 2-Hour Miyajima Micro-Itinerary (Simple + Works)
✅ Itsukushima Shrine Checklist
- Check tide timing (high tide “floating” mood / low tide texture mood).
- Do torii photos first, then the shrine corridors second.
- Build in a quiet loop away from the waterfront bottleneck.
- Wear shoes with grip (boards/stone can feel slick in wet weather).
- Keep a respectful pace—this is an active sacred site, not a photo set.
Official Resources (Use These Before You Go)
- Miyajima Visitor Information (official local portal): https://www.miyajima.or.jp/
- Japan National Tourism Organization (JNTO): https://www.japan.travel/en/
- Hiroshima Prefecture Tourism Office (authority reference): https://www.hiroshima-kankou.com/en/
💬 Frequently Asked Questions (FAQ)
🔗 Keep Exploring (Internal)
- Hakone iconic torii: Hakone Shrine Travel Guide
- Samurai-era landmark: Tsuruga Castle: Timeless Samurai Heritage
- Venice contrast (different “water landmark” energy): Rialto Bridge Venice Guide
➡️ Next Step (Do this now)
Pick your tide mood first (floating vs texture). Once the timing is locked, Miyajima stops feeling crowded and starts feeling sacred.
Map: Itsukushima Shrine Location (Miyajima)
Alt text suggestion: Itsukushima Shrine’s vermilion torii gate rising from the sea at Miyajima during a calm tide.
Author Note: Updated in 2026 with tide-first visit logic, crowd-flow strategy, and official resource links for Miyajima planning.